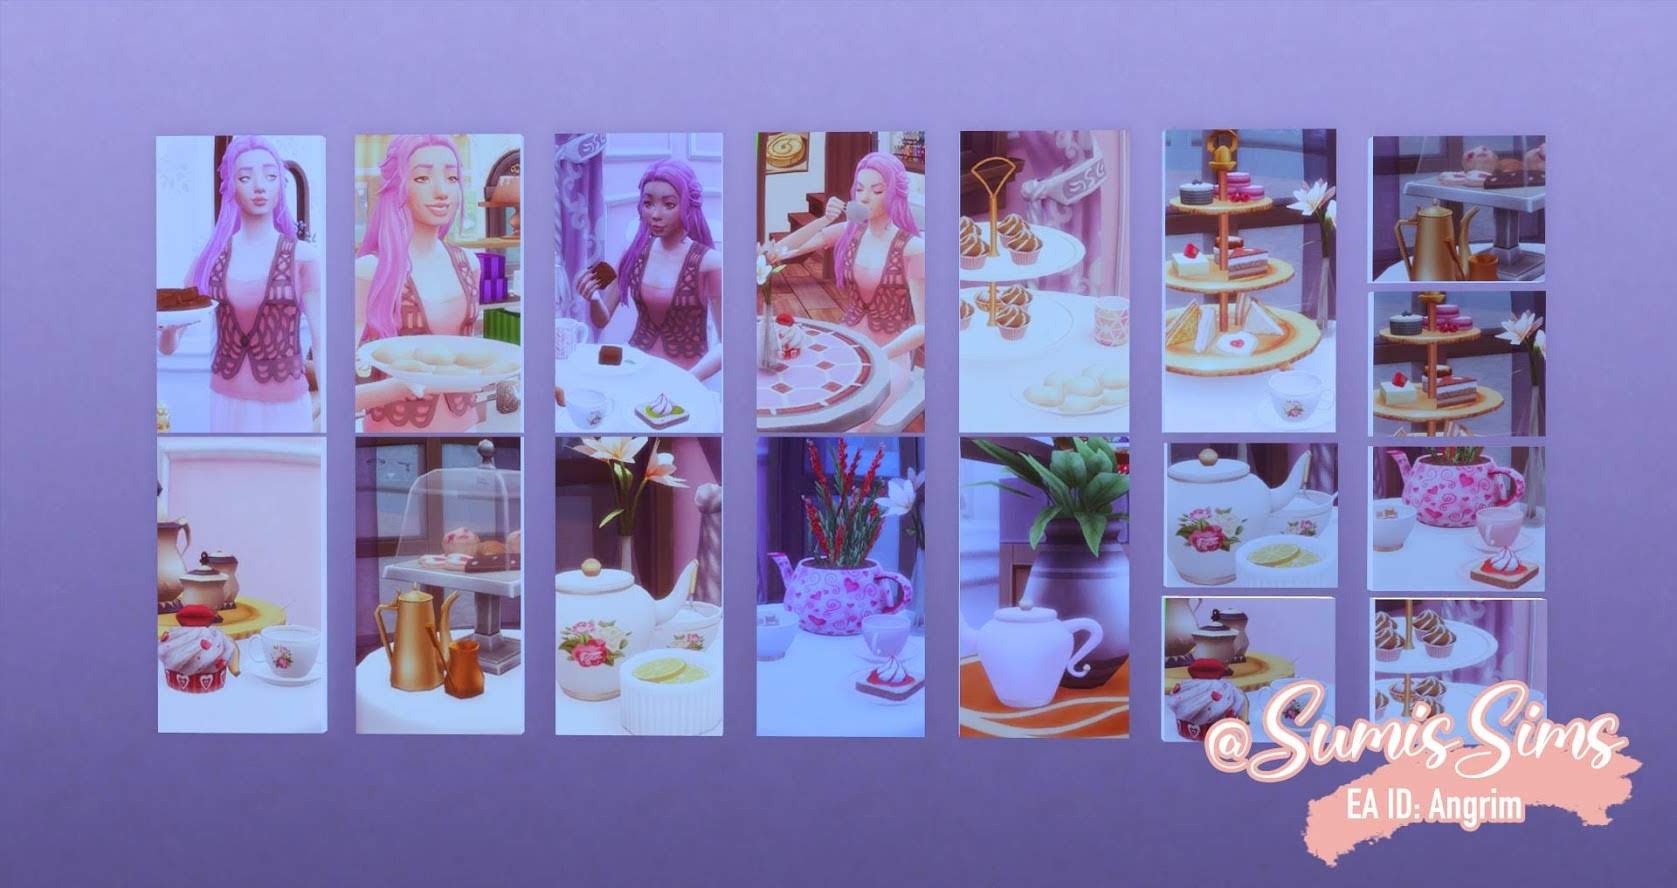
Some people asked me if I could write a tutorial on how to make cc free custom paintings for the Sims Gallery. This is my first tutorial in English. So please bear with me, if I make some mistakes. Some of the screenshots will be in German but I’ll translate everything you need to know.
There are already tons of tutorials on how to do this. Never the less it took me ages to really figure it out. Every tutorial was missing a piece of the puzzle to get it to work for me. It’s possible that not every single one of the following steps is necessary for you but they were for me.
What you gonna need:
First please install the following mods and software
- Sims 4 Studio* – Software to make custom content
- “Set Filter to painting by reference”-Mod* – Mod to remove painting texture of your paintings
- “XML Injector”-Mod* – This mod is needed to use the one listed before
- Some kind of photo editing software
*Disclaimer: I am not responsible for the linked websites and the files that can be downloaded here. Please be cautious and always use mods with care.
To make custom paintings all mods – except for the two listed above and the cc painting we are about to make – must be removed from your game. To make this easy you can just have two ‘Mods’ folders. One for painting mods and one for everything else. That way you can just ‘activate’ the one that is needed. In my case it looks like this:
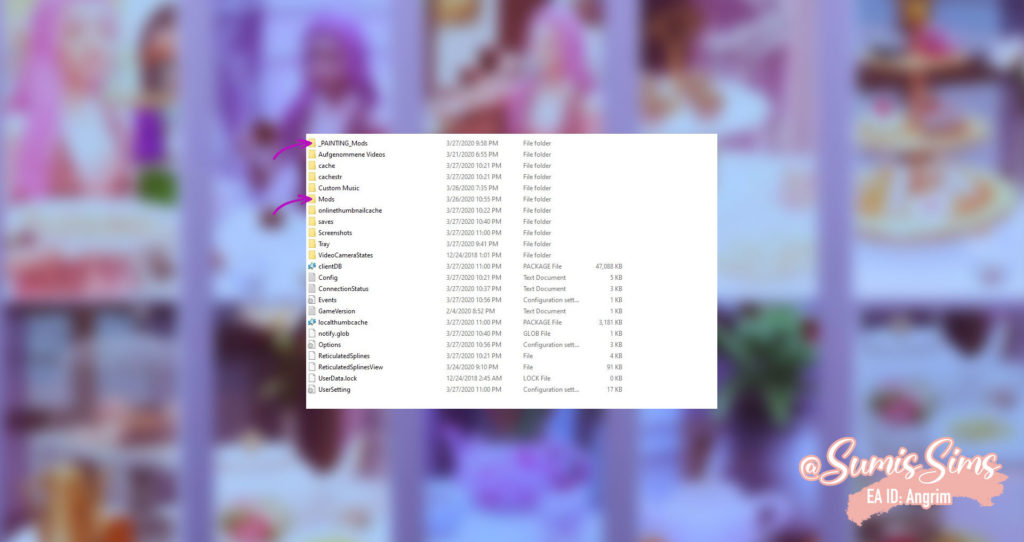
If you want to paint just rename the ‘Mods’ folder into something like ‘_Mods’ and than rename the ‘_PAINTING_Mods’ to ‘Mods’. The folder you want to be active in your game needs to be named ‘Mods’.
Next you have to start The Sims 4 Studio. Enter your name in the lower right corner and than click on ‘Object’.

Now you will get a list of all the objects in your game. We are looking for that base game painting in the lower left corner of the screenshot below. I use this particular painting because it has no light reflection and it always worked well as a template.
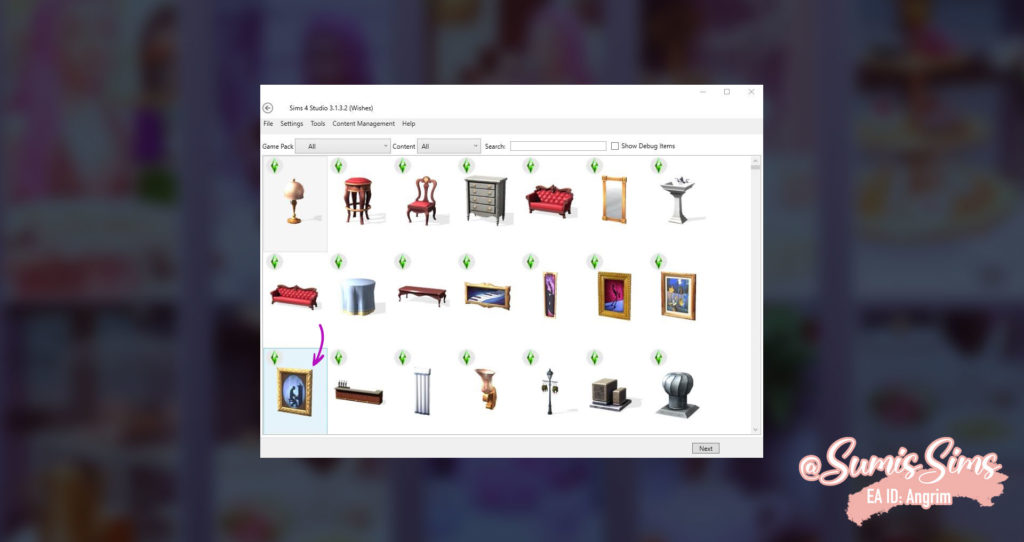
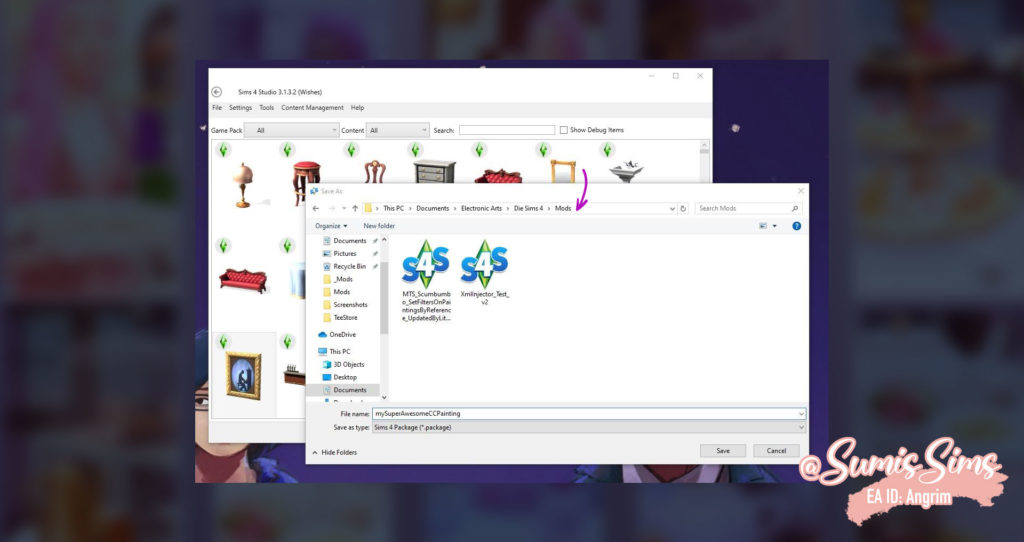
When you have found it klick ‘next’ and The Sims 4 Studio will ask you to name your new object. Make sure to save the file into your ‘_PAINTING_Mods’ folder and to give it a meaningful name. Something like ‘myCustonPaintings.package’ and not ‘ydvnsdnv.package’. That way you will always be able to finde the file again.
After that you will get to a window with all the information about this particular item. Click on the ‘texture’ tab and than export the texture.
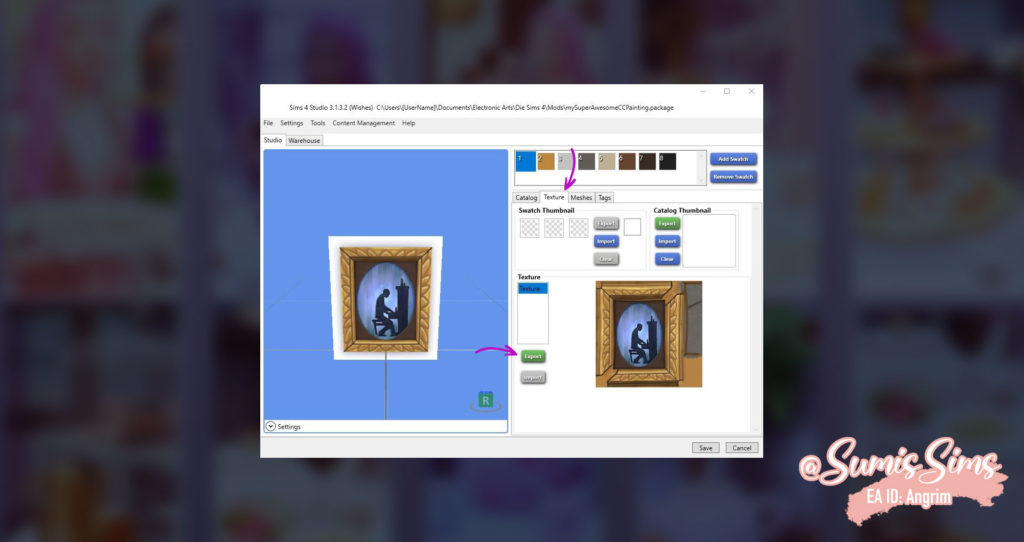
This will give you a PNG file that you’ll have to open with the photo editing software of your choice. I’m using Photoshop. Don’t close The Sims Studio while editing your images.
Since the picture we are using has a different aspect ratio than the paintings our sims will be creating, I gave the template a neon green filling and cut a piece from the center, creating a black area about 148 pixel in width and 329 pixel in height. The neon green areas left on the edges are unlikely to be part of the painting and form a visible edge. That way we can make sure that no important parts of the image will be cut when ours sims get to the painting. It should look like this:
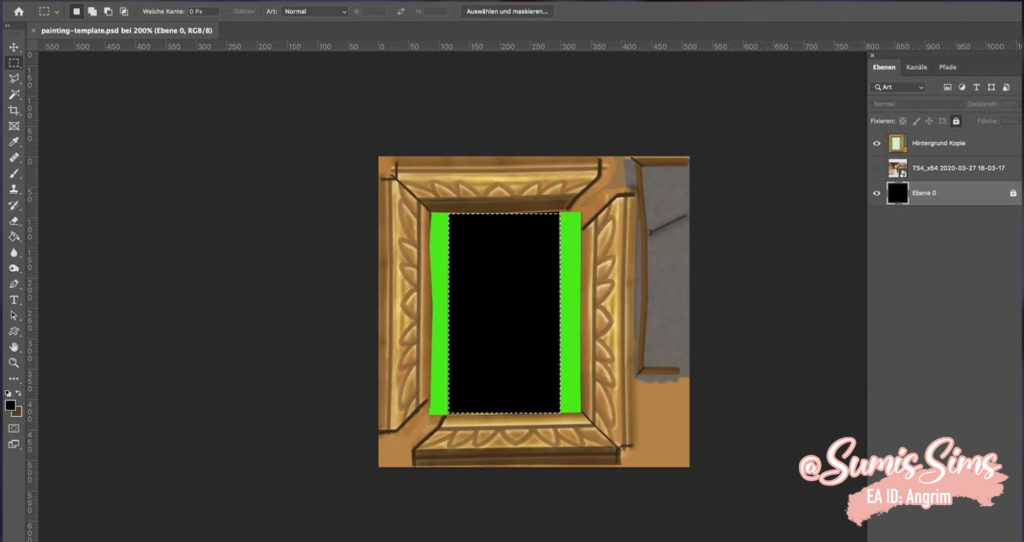
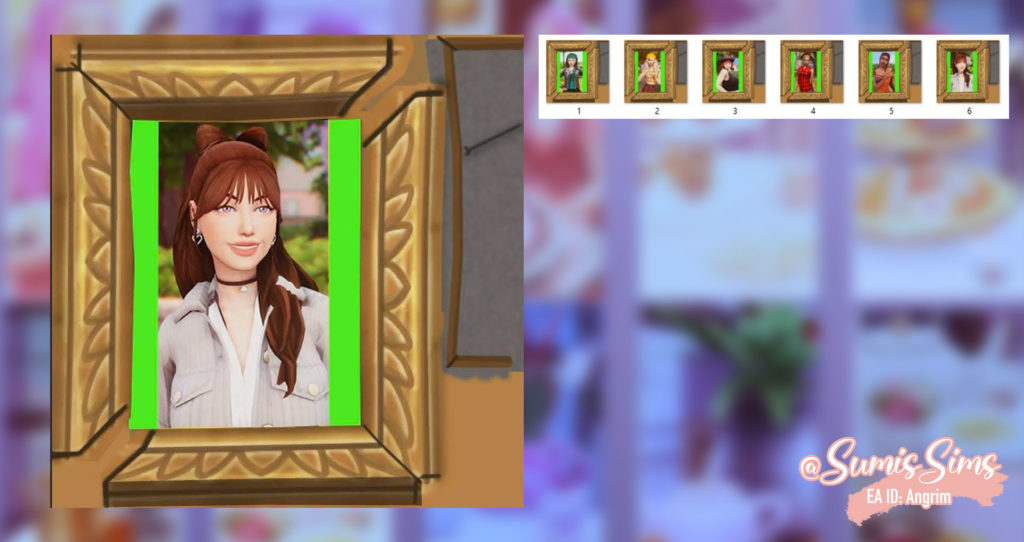
The black area is where your images go. If you are using Photoshop or another software that works with layers just make the frame a layer and put your images as separate layers below. Save your templates as PNGs as you can not open other filetypes in The Sims 4 Studio. When you’re finished, you should end up with something like this:
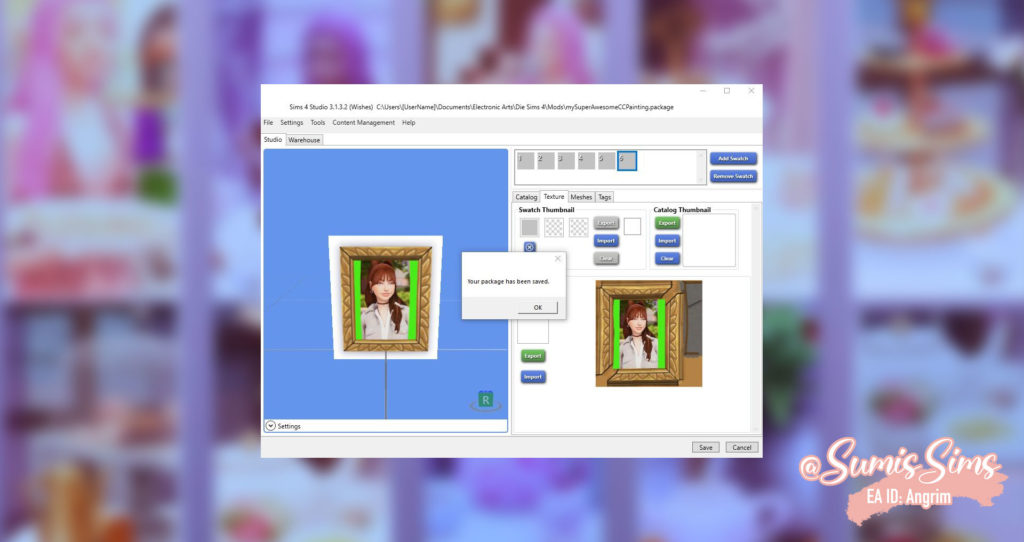
Now go back to The Sims 4 Studio. You can remove all swatches you don’t need or add new swatches. Import every PNG to a new swatch. As seen on this screenshot:
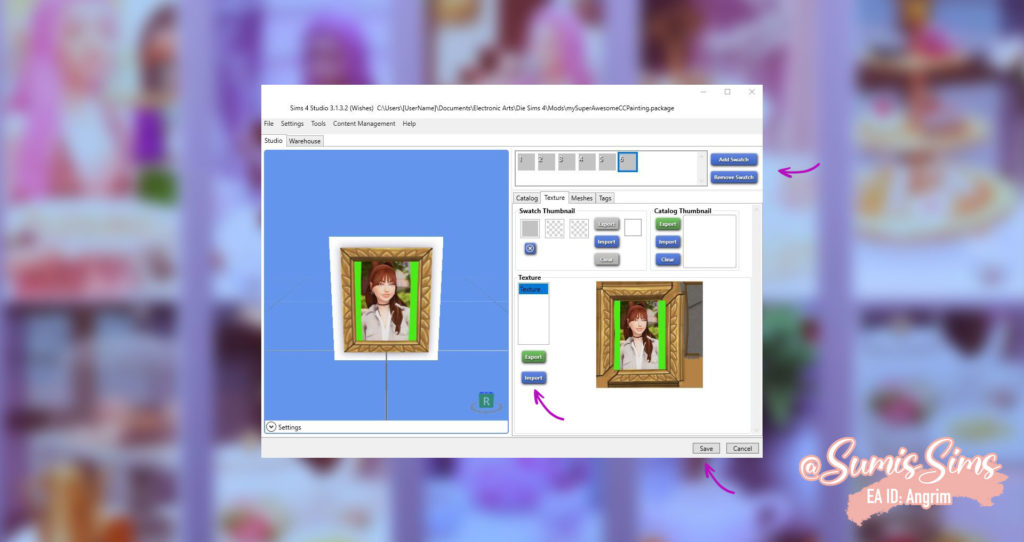
When all images where imported and you are done click save. And you will get a confirmation that your file was saved.
Now we can almost run the game. Make sure the folder with the mods we need for painting is called ‘Mods’. Before starting your game and every time you switch the ‘Mods’ folders delete the file called localthumbcache. It’s on the same level as your ‘Mods’ and ‘Screenshot’ folders. Don’t worry, your game will recreate this file every time it is started.
Now run your game. Here is one of the important parts that many tutorials do not mention: Create a completely new savegame you will only use for making paintings.
At this point many tutorials will tell you to just download a sim from the gallery called ‘master painter’ but that did not work for me. Rather create a new house hold with eight random sims. It really does not matter what they look like but you can make sure they like to paint by giving them traits like this:

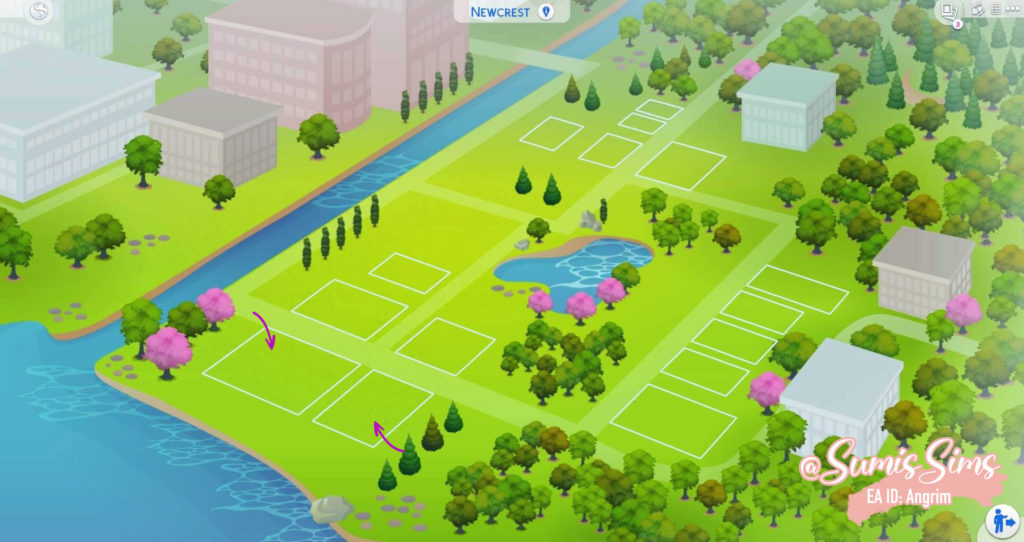
You’ll need two adjacent lots. I would recommend these two lots in Newcrest.
Let your household move in on the right one. Than go to the other lot using build mode.
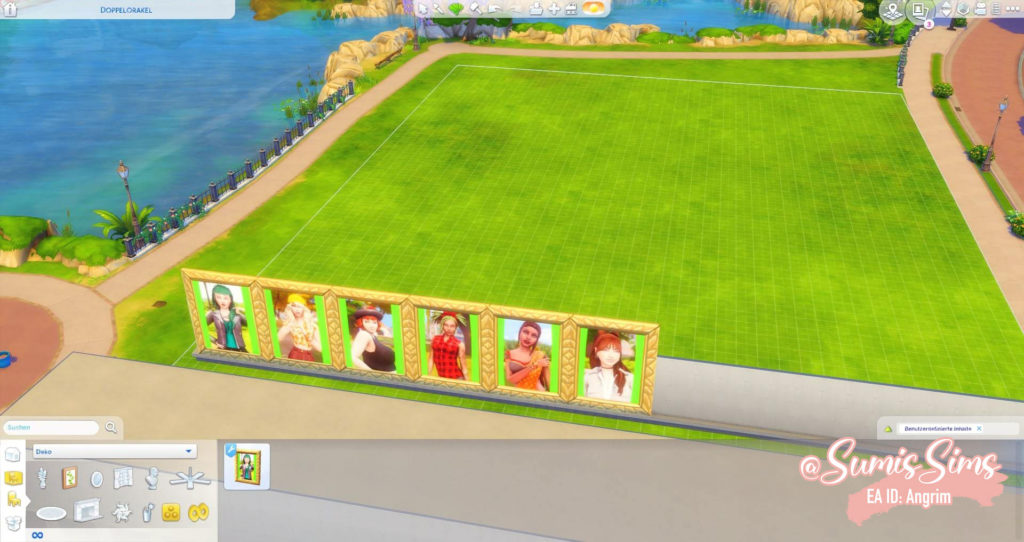
Now the interesting part begins. Build a wall as close to the edge of the lot as possible. Make it as long as it can be and raise it two times as shown on the screenshot below. Press Ctrl + Shift + C and type the cheat ‘bb.moveobejcts’. That way you can put your paintings closer together. To find your painting look in the category ‘Decorations’ >> ‘Paintings’ and set the search filter on the right to ‘custom content’. The only item showing up should be your painting.
Now scale the painting up. Two times should be enough. Put swatch next to swatch until you used all swatches or the wall is full. Now switch to the lot where you sims live.
First, cheat yourself some money using the cheat ‘motherlode’ two or three times. Than use the comand ‘testingcheats true’ and the cheat ‘bb.ignoregameplayunlocksentitlement’. That way you will be able to buy the most expensive easel and create the best quality paintings. To make your sims be able to ‘paint by reference’ use the cheat ‘stats.set_skill_level Major_Painting 10’ on every single one of them.
Next you build a platform as high as the wall you build before and add some stairs. Lineup one easel for every painting. Most tutorials just use the platform, but as I let my sims paint in summer and I don’t want them to die of overheating, I made it a room and used these ‘Island Living’ windows for a good view. To fill the needs of your sims hold shift and click on the mailbox. Than click ‘Alter Needs’ >> ‘Fill Needs (Household)’. Your painting factory should be looking something like this:
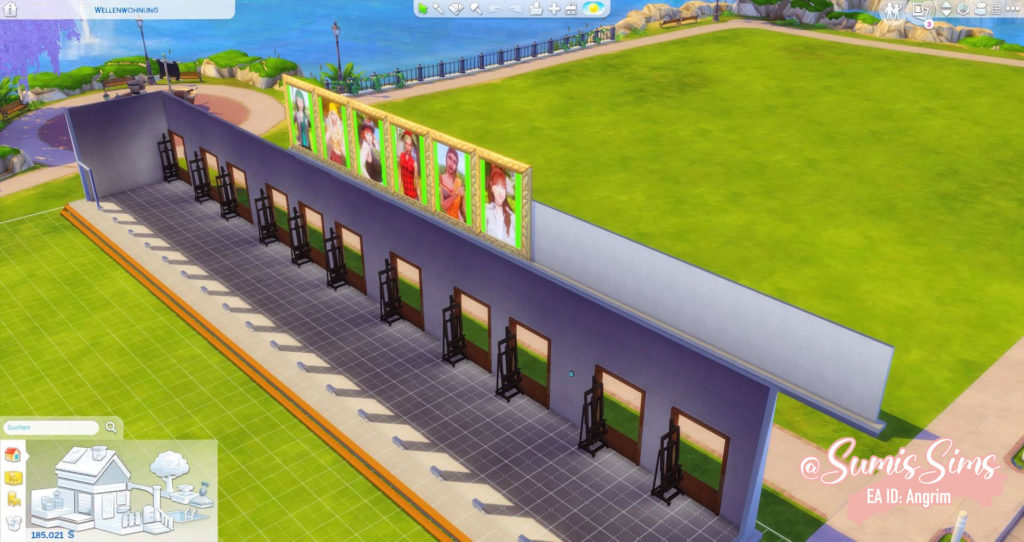
The lineup should look like this:
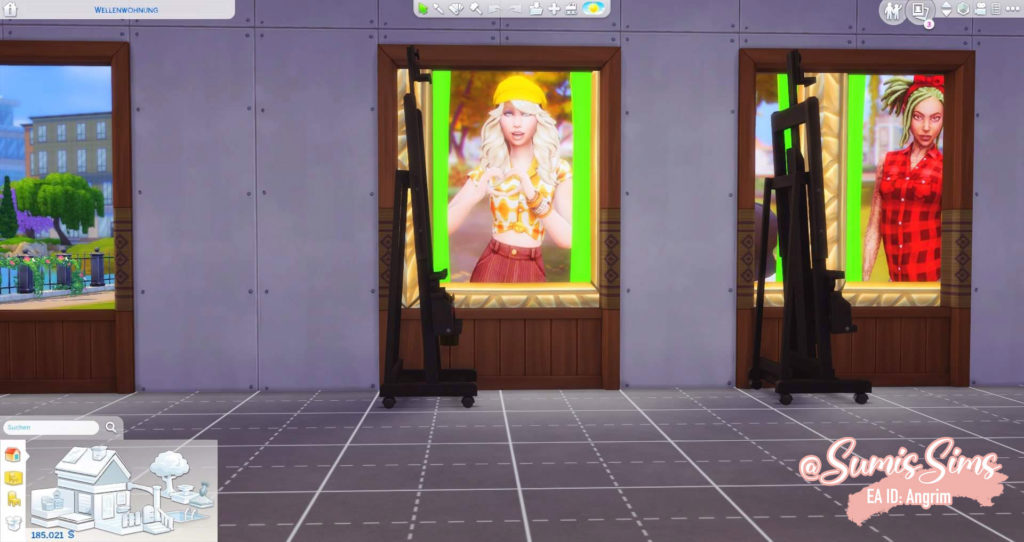
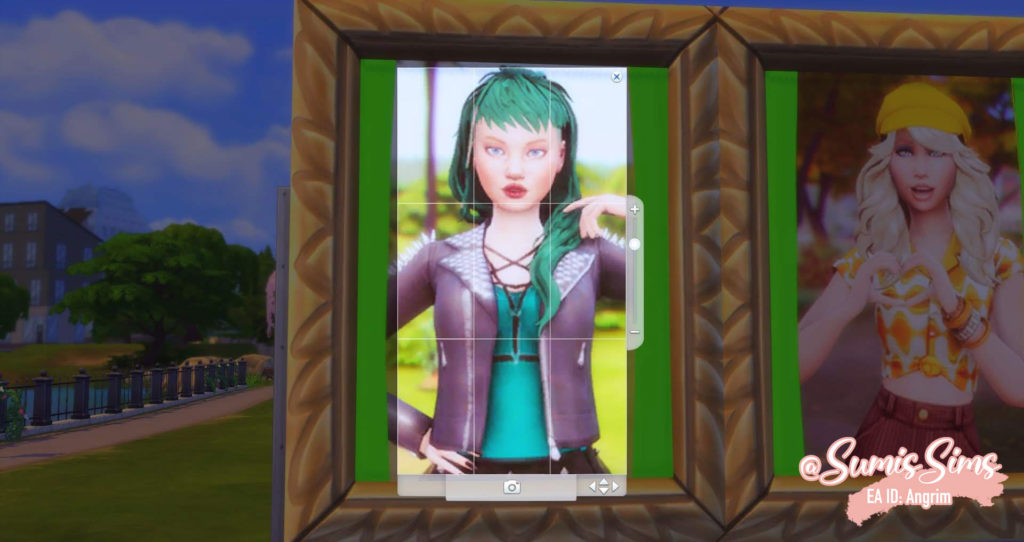
Now let every sim paint a picture by reference. The best light for that is around 1 pm in summer. Choose a size of your liking. I mostly use the largest one for 100 Simoleons. The option to pick a motive will pop up and look like the next screenshot. It might need some fiddling to get the right position. I’d recommend to place it roughly and than us the + – slider for a more precise framing. Now you can see what the green edges are good for.
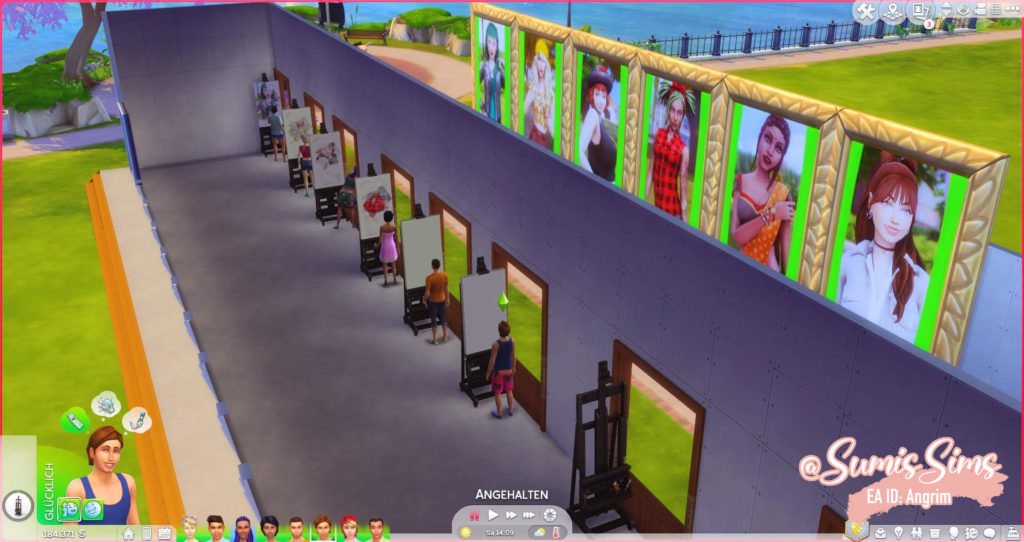
When you sims started painting click on the painting and set the filter to ‘no filter’ to get rid of that grainy look. In action your painting factory looks like this:
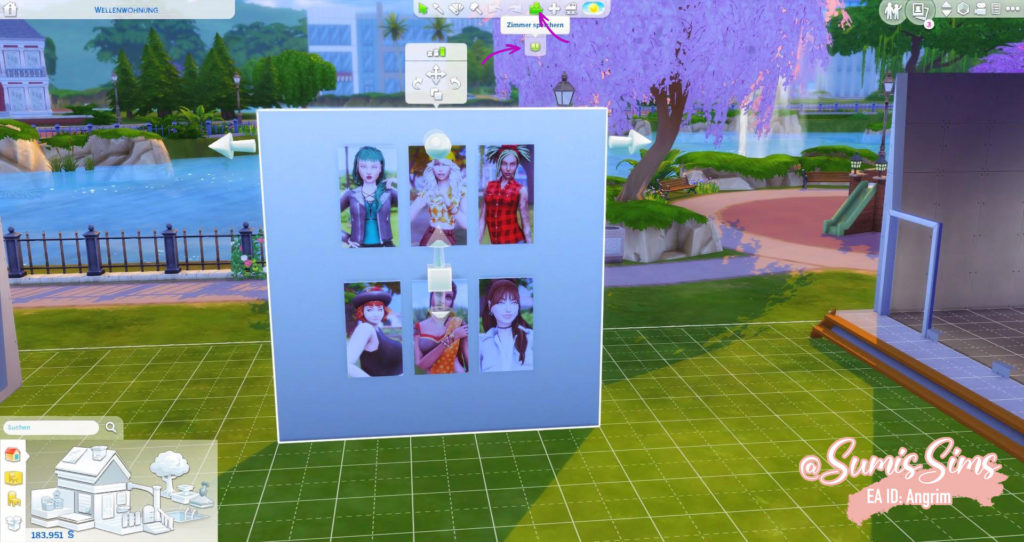
When all paintings are done, put them on a wall like shown below. Still in build mode click on the wall and than on the two marked icons to put the wall as a room to the gallery.
The paintings should not be marked as custom content. If it does make sure you followed every step of this tutorial. If you did and it still does show up as CC I have really no clue. I’m sorry. ?
Add a name and some hashtags to the description and use the button on the lower left to upload the paintings.
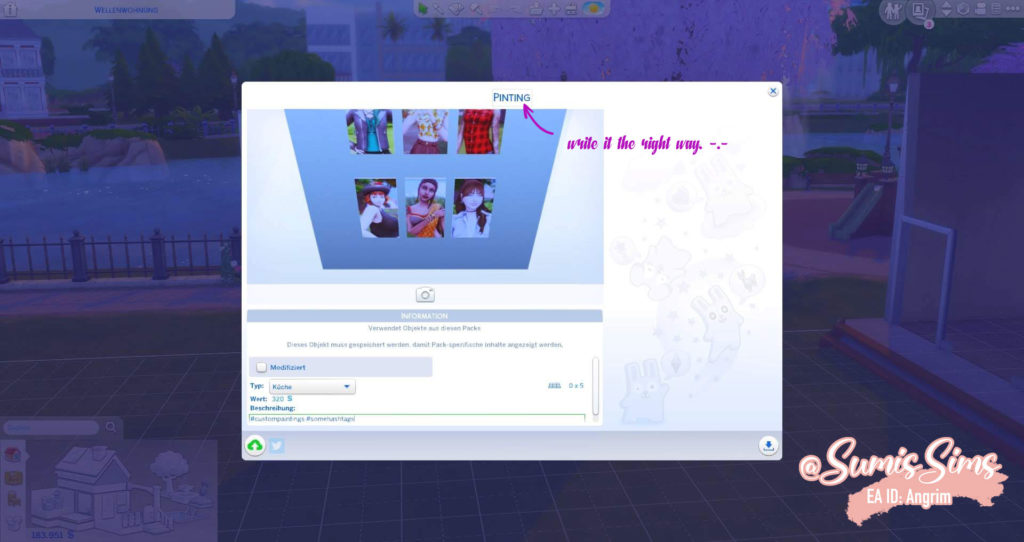
What I like to do is place some random rooms so the sims have stuff to do when the lighting is not right for painting. But you could also speed up time with the cheat ‘clock.advance_game_time 8 5 3’ where the numbers stand for the hours minutes and seconds you want to got to the future.
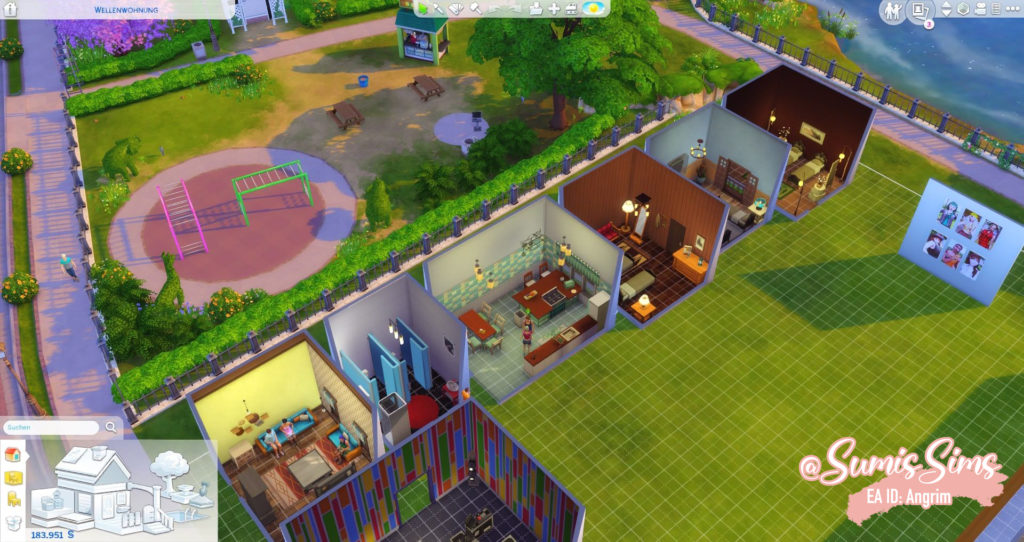
This is it. This is how you make custom paintings. I hope this tutorial could help you. If you got any questions, don’t be shy. Ask me via Twitter or Instagram (@SumisSims).
